Facebook Ads platform offers some built-in analytical features to gain insights into your ads and campaigns. However, connecting Facebook Ad data with a centralized data warehouse solution like Snowflake can offer a consolidated view of your marketing data. By replicating data from Facebook Ads to Snowflake, you can also create custom reports tailored for specific needs, enabling deeper insights into customer behavior.
In this guide, we’ll not only give you a solid understanding of both services but also introduce a reliable, automated method to streamline moving your data to Snowflake. We will then go through all the steps and also look at the manual approach to connect these platforms. So, let’s dive in!
Facebook Ads Overview
Facebook Ads is a digital advertising platform founded by Facebook in 2007. It enables you to promote products by running targeted advertising campaigns on the Facebook social media platform and its associated network. The platform's built-in analytical features provide valuable insights into ad performance and audience engagement.
By leveraging the extensive features of Facebook Ads, you can significantly broaden your outreach to the targeted audience. This involves implementing strategies that leverage user behavior, demographics, and areas of interest. Additionally, it offers remarketing and retargeting options, allowing you to better reach users who've already shown interest in your products. Overall, these features help you to re-engage with potential customers and drive conversion sales.
Snowflake Overview
Snowflake is a cloud-based modern data analytics and data-warehousing service founded in 2012. With its cloud-native architecture, Snowflake provides a flexible solution to handle enormous data analytics needs efficiently. You can use SQL-based queries to handle both structured and semi-structured data formats, like Parquet, JSON, and XML.
2 Ways to Connect Facebook Ads to Snowflake
You can efficiently migrate your data from Facebook Ads via Snowflake integration in two different ways:
- Method 1: Using no-code tools like Estuary Flow
- Method 2: Manually load data from Facebook Ads to Snowflake
Method 1: Using No-Code SaaS Tools Like Estuary Flow
If you are looking for a reliable no-code solution to connect Facebook to Snowflake, using a data pipeline tool like Estuary Flow can be an efficient option. Flow is a budget-friendly data integration platform that has in-built connectors to extract and replicate data from Facebook Ads to the Snowflake. It supports real time data streaming, enabling the data processing in real-time to derive insights quickly. This allows you to analyze data as soon as it is replicated in the Snowflake.
Before you start loading your Facebook Ads data into Snowflake using Estuary Flow, let's take a look at the prerequisites and then follow the steps to integrate Facebook marketing with Snowflake:
Prerequisites: Facebook Ads and Snowflake have some prerequisites you’ll need to meet before connecting to Flow. So, before you continue, check out the Estuary documentation for:
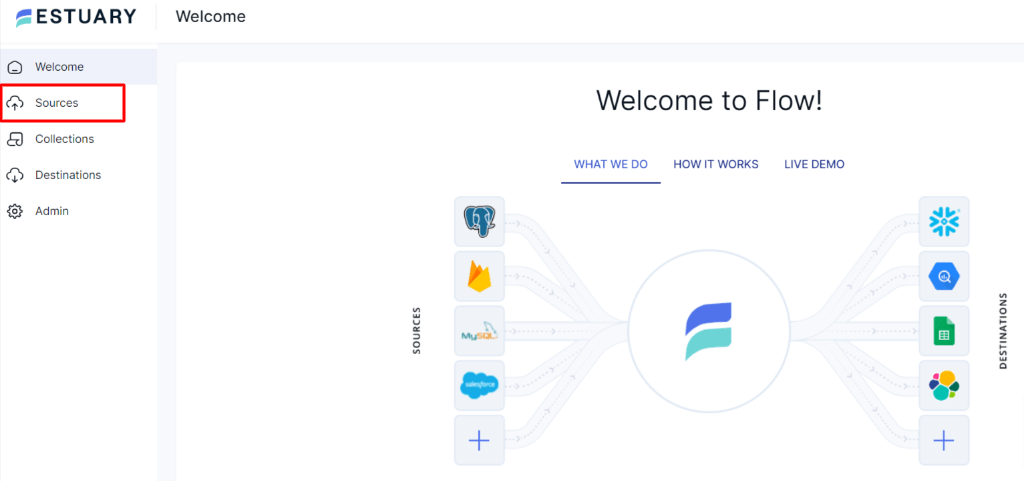
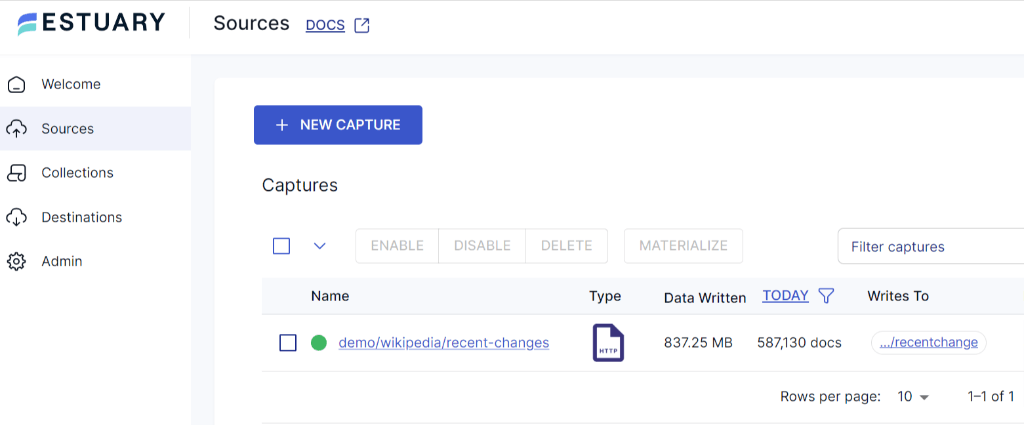
Step 1: Log in to your Estuary Flow account or register to try it out (your first pipeline is free!). Once you’ve logged in, click on Sources, located on the left side of the Estuary dashboard.
Step 2: In the Sources window, click on the + NEW CAPTURE button.
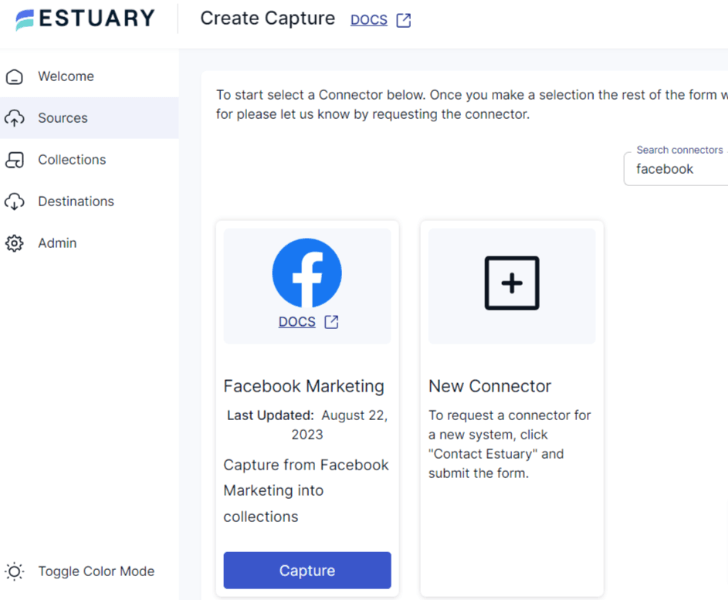
Step 3: You’ll be directed to the Create Capture page. In the Search connectors box, type Facebook Marketing and click on the Capture button.
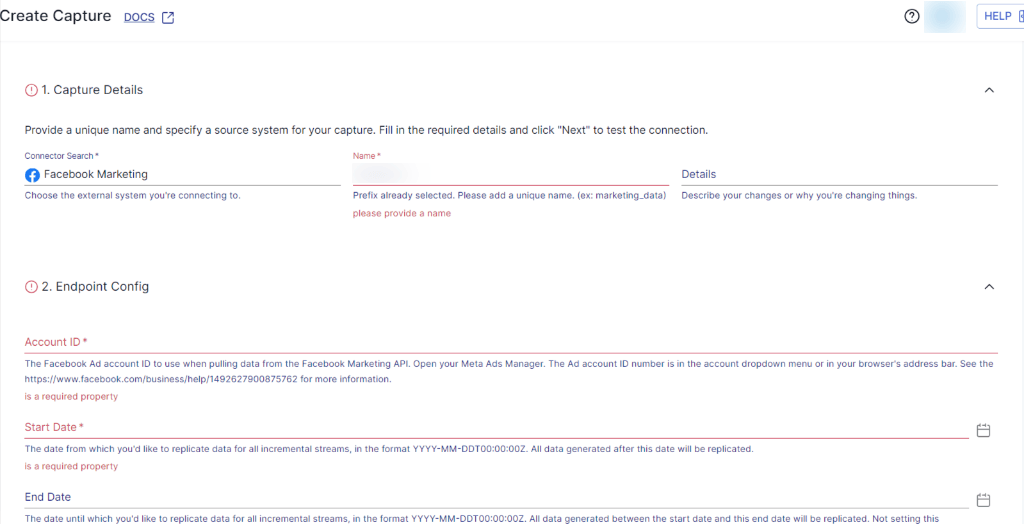
Step 4: On the Create Capture page, you need to fill in the Capture and Endpoint Config details. Enter a unique name for your Capture. Next, fill in the details like Facebook Account ID, Start Date, and End Date. In the Authentication section, authenticate your Facebook Ads account by clicking the button below OAuth and providing Access Token credentials to proceed.
Note: Estuary Flow does not access any form of data during the authorization process.
Step 5: Once you’ve filled in all the mandatory fields, click NEXT.
Step 6: Click on the SAVE AND PUBLISH button. Estuary Flow will now initiate a connection with your Facebook Ads account.
Now let’s set up your data destination, which is Snowflake.
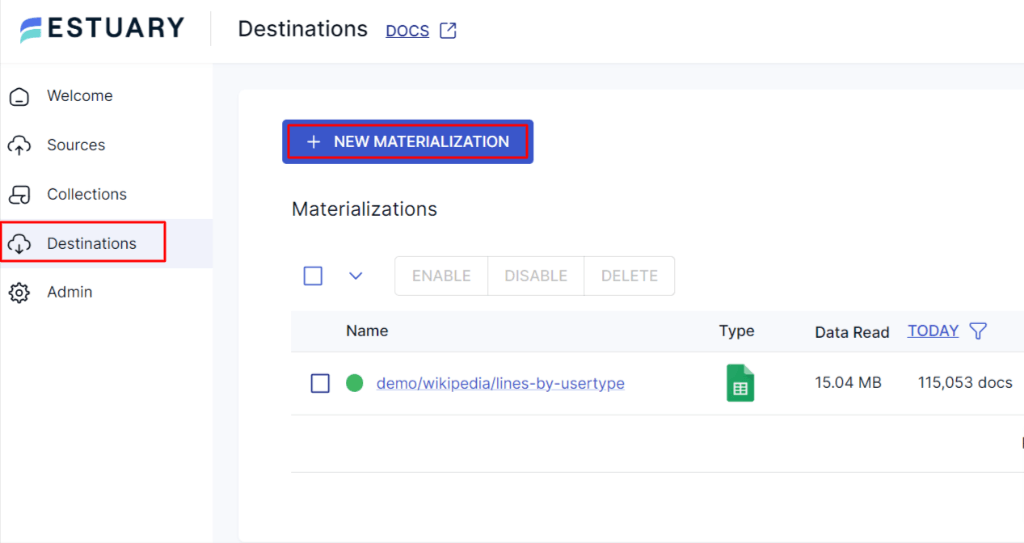
Step 7: To set up your destination, navigate to the Estuary dashboard and click on Destinations on the left-side pane. Then click on the + NEW MATERIALIZATION button.
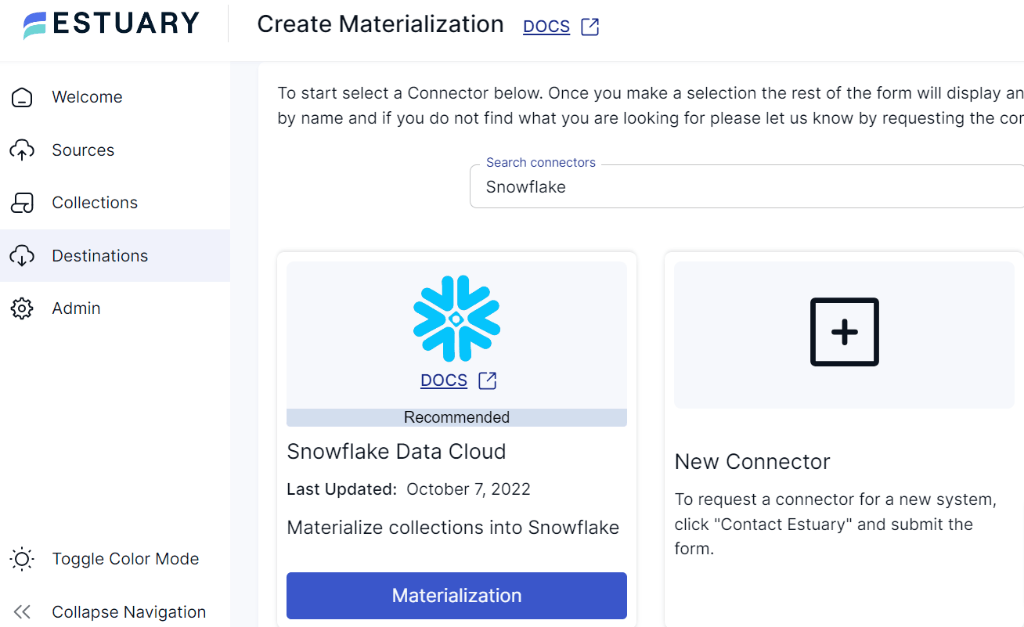
Step 8: You’ll be directed to the Create Materialization page. In the Search Connectors box, type Snowflake and click the Materialization button.
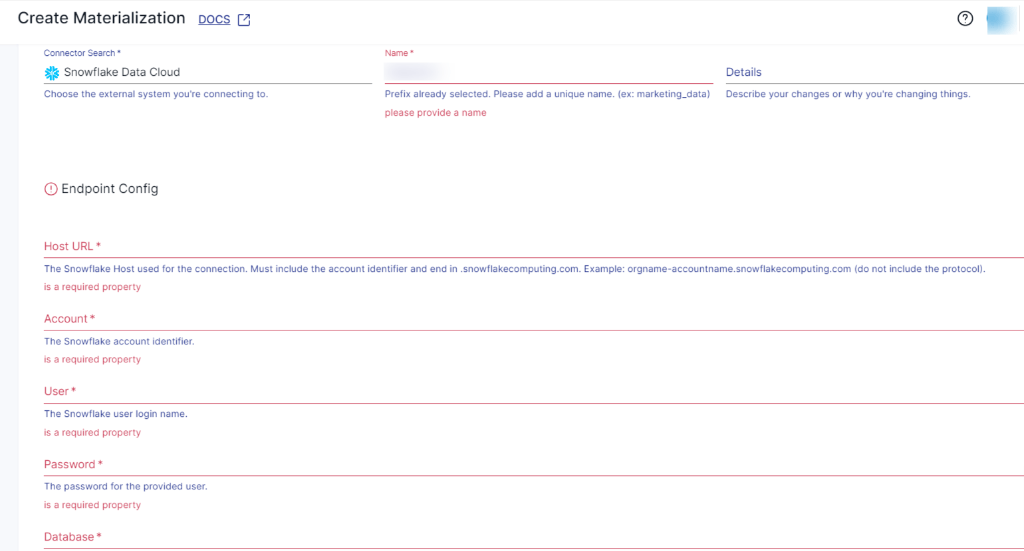
Step 9: In the Materialization Details section, provide a unique name for your Materialization. In the Endpoint Config section, fill in the Snowflake Account identifier, User login name, Password, Host URL, SQL Database, and Schema details.
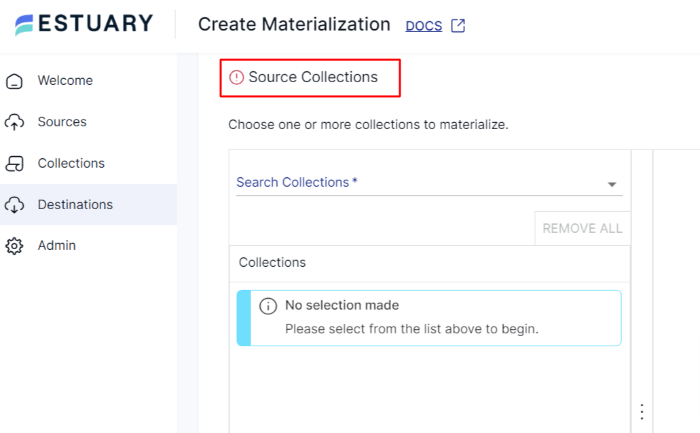
Step 10: Once you’ve completed all the mandatory fields, click on NEXT. Finally, click on SAVE AND PUBLISH. The data collection from Facebook Ads may already be present. If not, use the Source Collections section to identify and include them.
After successfully completing the above steps, Flow will connect and replicate data from your Facebook Ads account to Snowflake in real-time, ensuring your data is always up-to-date.
Benefits of Using Estuary Flow
Check out some of the key advantages of using Estuary Flow:
Real-time Synchronization and Replication: Estuary uses change data capture (CDC) and replicates data from Facebook Ads to Snowflake in real time, ensuring data in Snowflake remains up-to-date. This allows you to quickly perform real time analytics, generate reports, and make decisions on current data.
Faster Implementation: Estuary Flow CDC only requires a 2-step process (i.e., Capture and Materialization) to set up your data pipeline. And your data pipeline is automated, ensuring you don’t have to repeat manual tasks and format data to enable transformations.
Scalability: Designed with scalability in mind, Flow boasts the capability to manage active workloads at up to a remarkable 7 GB/s CDC. No matter the size of the database, Estuary Flow caters for growing data needs.
Exactly-once Semantics: Flow is built on Gazette (similar to Kafka), which provides exactly-once processing semantics, eliminating the de-duplication of real-time data.
Data Consistency: Estuary maintains data consistency and integrity between your Facebook Ads and Snowflake account. It will ensure that all the changes are replicated correctly to the Snowflake database, preventing latency and ensuring consistency across both systems.
Method 2: Manually Load Data From Facebook Ads to Snowflake
Manually replicating data from Facebook Ads to Snowflake involves:
- Exporting data from Facebook Ads account to a CSV file,
- Downloading and cleaning the CSV file,
- Uploading it to the Snowflake staging area,
- Copying data from the staging area to the Snowflake database.
Here's a detailed step-by-step guide for the manual ETL approach to load data from Facebook Ads to Snowflake.
Step 1: Log in to your Facebook Ads Manager Account, and navigate to the ads manager interface.
Step 2: Decide the specific data that you want to export within a time period from Facebook Ads. This can include performance data, campaign metrics, audience insights, clicks, impressions, or the entire report.
Step 3: If you want to export the entire report, click on the Reports button and select the Export table data option.
Whereas, if you want to export specific columns, go to Reports > Create custom report > Check the required breakdowns and metrics. Once you've selected the columns that you want to export, click on the Run button.
Step 4: Now click on the Export button located in the top-right corner of the report view.
Choose the CSV (Comma-Separated Values) format as the export option from the pop-up window and click on the Export button. Facebook Ads Manager will now generate the CSV file.
Step 5: Verify the downloaded CSV file is properly formatted with column headers and subsequent rows.
Step 6: To load data into Snowflake, create a table with appropriate column names, data types, and constraints that should match the data structure with the CSV file. To create tables in Snowflake, you can use Snowflake's CLI, SQL Client, or web interface.
Step 7: Before loading CSV files data into the table, first, you must upload it to a Snowflake staging area. It is a temporary storage location to store external files for efficient data loading. To create a staging area, enter the following command in CLI.
plaintextCREATE OR REPLACE STAGE [ IF NOT EXISTS ] <staging_area_name>Replace <staging_area_name> with the name that you want to assign to your Snowflake staging area.
Step 8: To copy CSV file data from the local machine to the staging area that you’ve just created, run the following command.
plaintextput <path_to_csv_file> @~/staging_area_nameStep 9: Now, to load data from the staging area to Snowflake's table, use the COPY INTO command.
plaintextCOPY INTO <table_name>
FROM <staging_area_name>/<path_to_csv_file>
FILE_FORMAT = (TYPE = CSV)
;
Replace <table_name> with the name of your table in Snowflake and <staging_area_name>/<path_to_csv_file> with the location of the CSV file in the Snowflake staging area.
Step 10: That’s it! After executing the above commands, your Facebook Ads data in CSV files will be loaded into the Snowflake table.
Drawbacks of the Manual Process
The manual process includes several steps, from extracting Facebook Ads data to transferring it into the Snowflake database. As the entire process is divided into different steps, it can be prone to several challenges.
Time Consuming: For real time scenarios, the entire process can be time-consuming, especially if you're dealing with massive data sets. For each CSV file, you would need to perform data extraction, transformation, validation, and then load into the Snowflake, which could be a tedious task.
Lack of Automation: The manual process requires you to continuously export and load data every time you want to update it in Snowflake. This manual intervention can lead to delays in data updates for real-time analytics.
The Takeaway
Overall, you’ve learned two methods to move data from Facebook Ads to Snowflake. The manual process requires human intervention and monitoring, which might be suitable for small amounts of data. But as the data volume grows, it will be challenging to manage data manually, leading to inefficiencies and delays. To overcome challenges involved in manual processes, you should shift to real time and effective solutions like Estuary Flow.
Ready to replicate your data from Facebook Ads to Snowflake? Give a try to Estuary Flow—a simplified and real time data integration solution. Sign up for free and start today!
Are you interested in learning how to move your Facebook Ads Data to other destinations? Check out these in-depth tutorials:

Author
Popular Articles


